Share a Student Group
Last updated: June 29, 2026
When you share a group, the person you shared it with will only be able to see the students that they already have access to if they looked on the Students tab. Sharing a group will not provide access to a student that isn’t already visible to the staff member in Student Success. I.e. a classroom user will only see the students that are scheduled into a course with them in your student information system. A building user will only see students in their building.
How to Share a Group
Go to the Groups tab
Click on the group to share
Click Share button
Select the staff you want to share the group with by clicking the checkbox next to the name
Add a note, if desired
Click Share
A notification email will be sent to the selected staff members about the availability of the group. No individual student data will be included in the email.
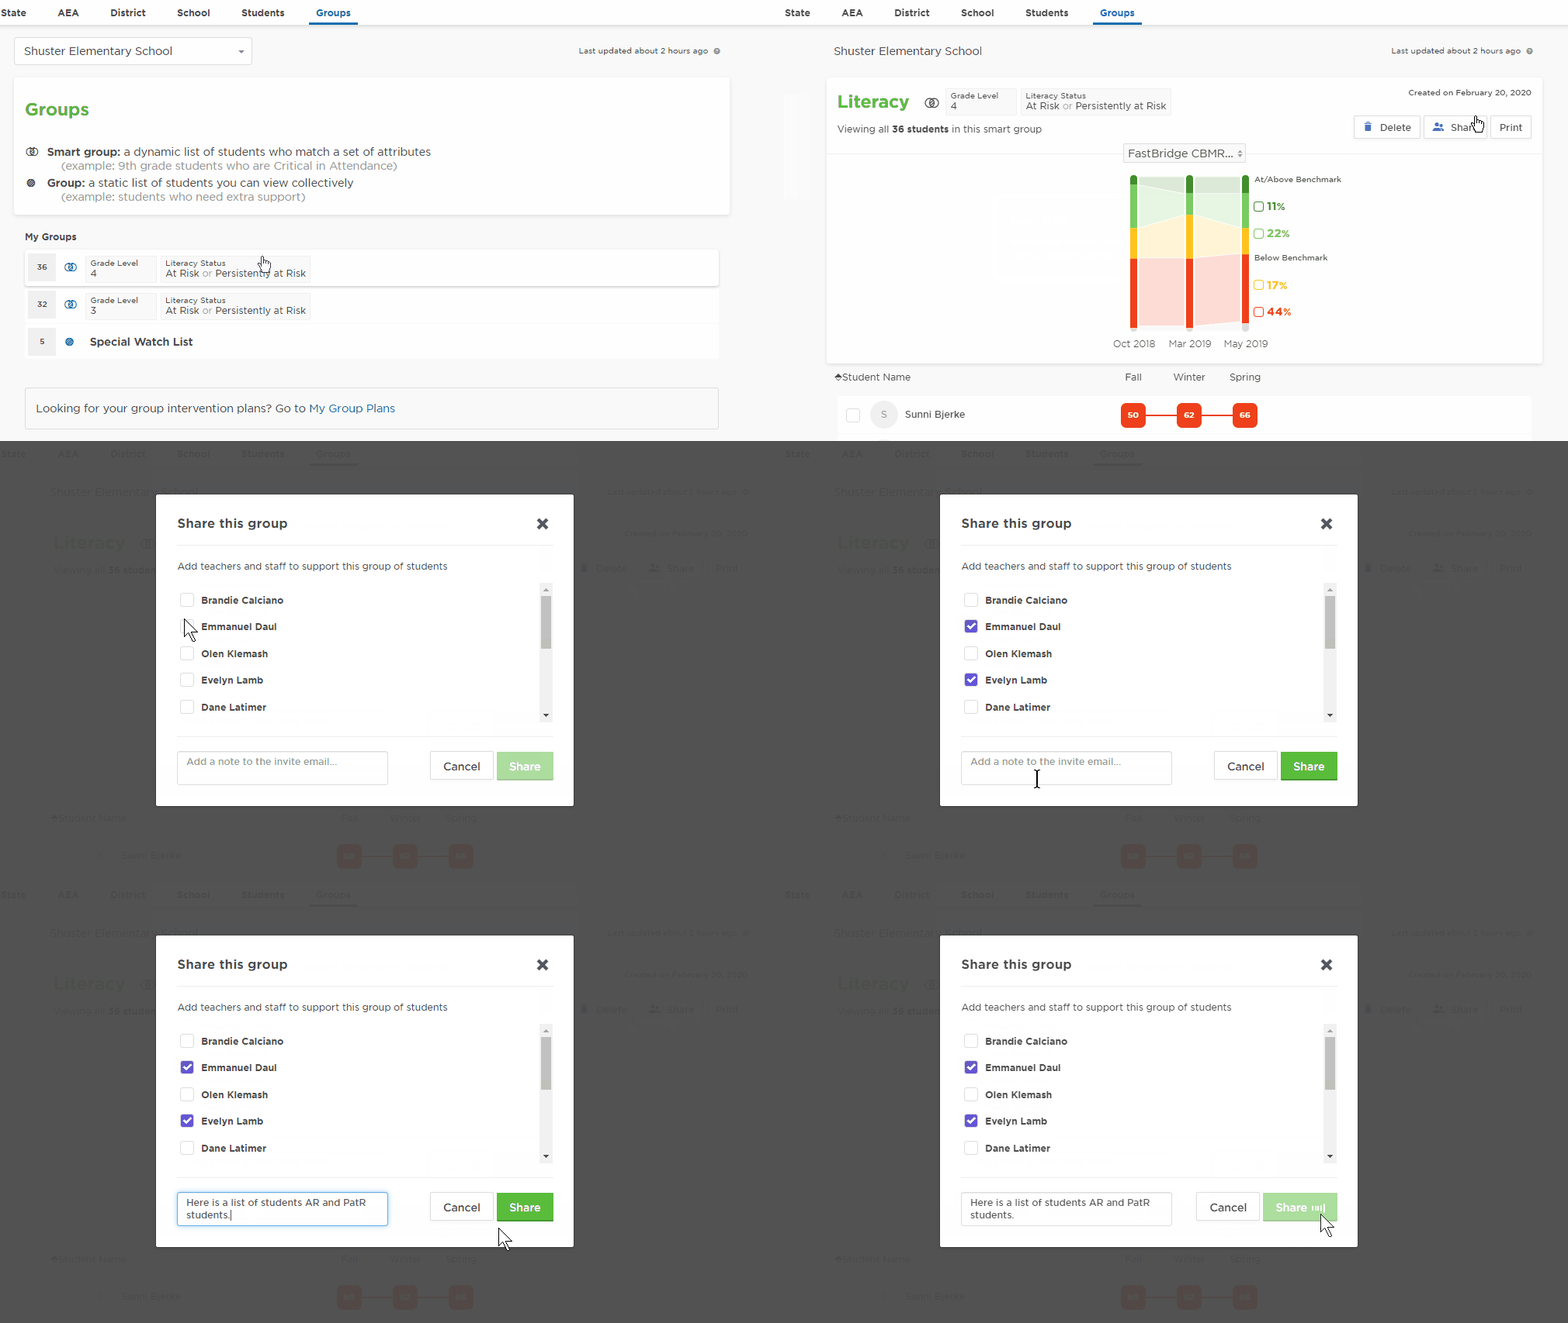
*visual above is a non-printable gif animation
You can also share a smart group without saving the group for yourself
Go to the Students tab
Select desired demographic filters
Click the Share button on the upper right corner of graph
Select person to share group with from the drop down list
A notification email will be sent to the selected staff members about the availability of the group. No individual student data will be included in the email.
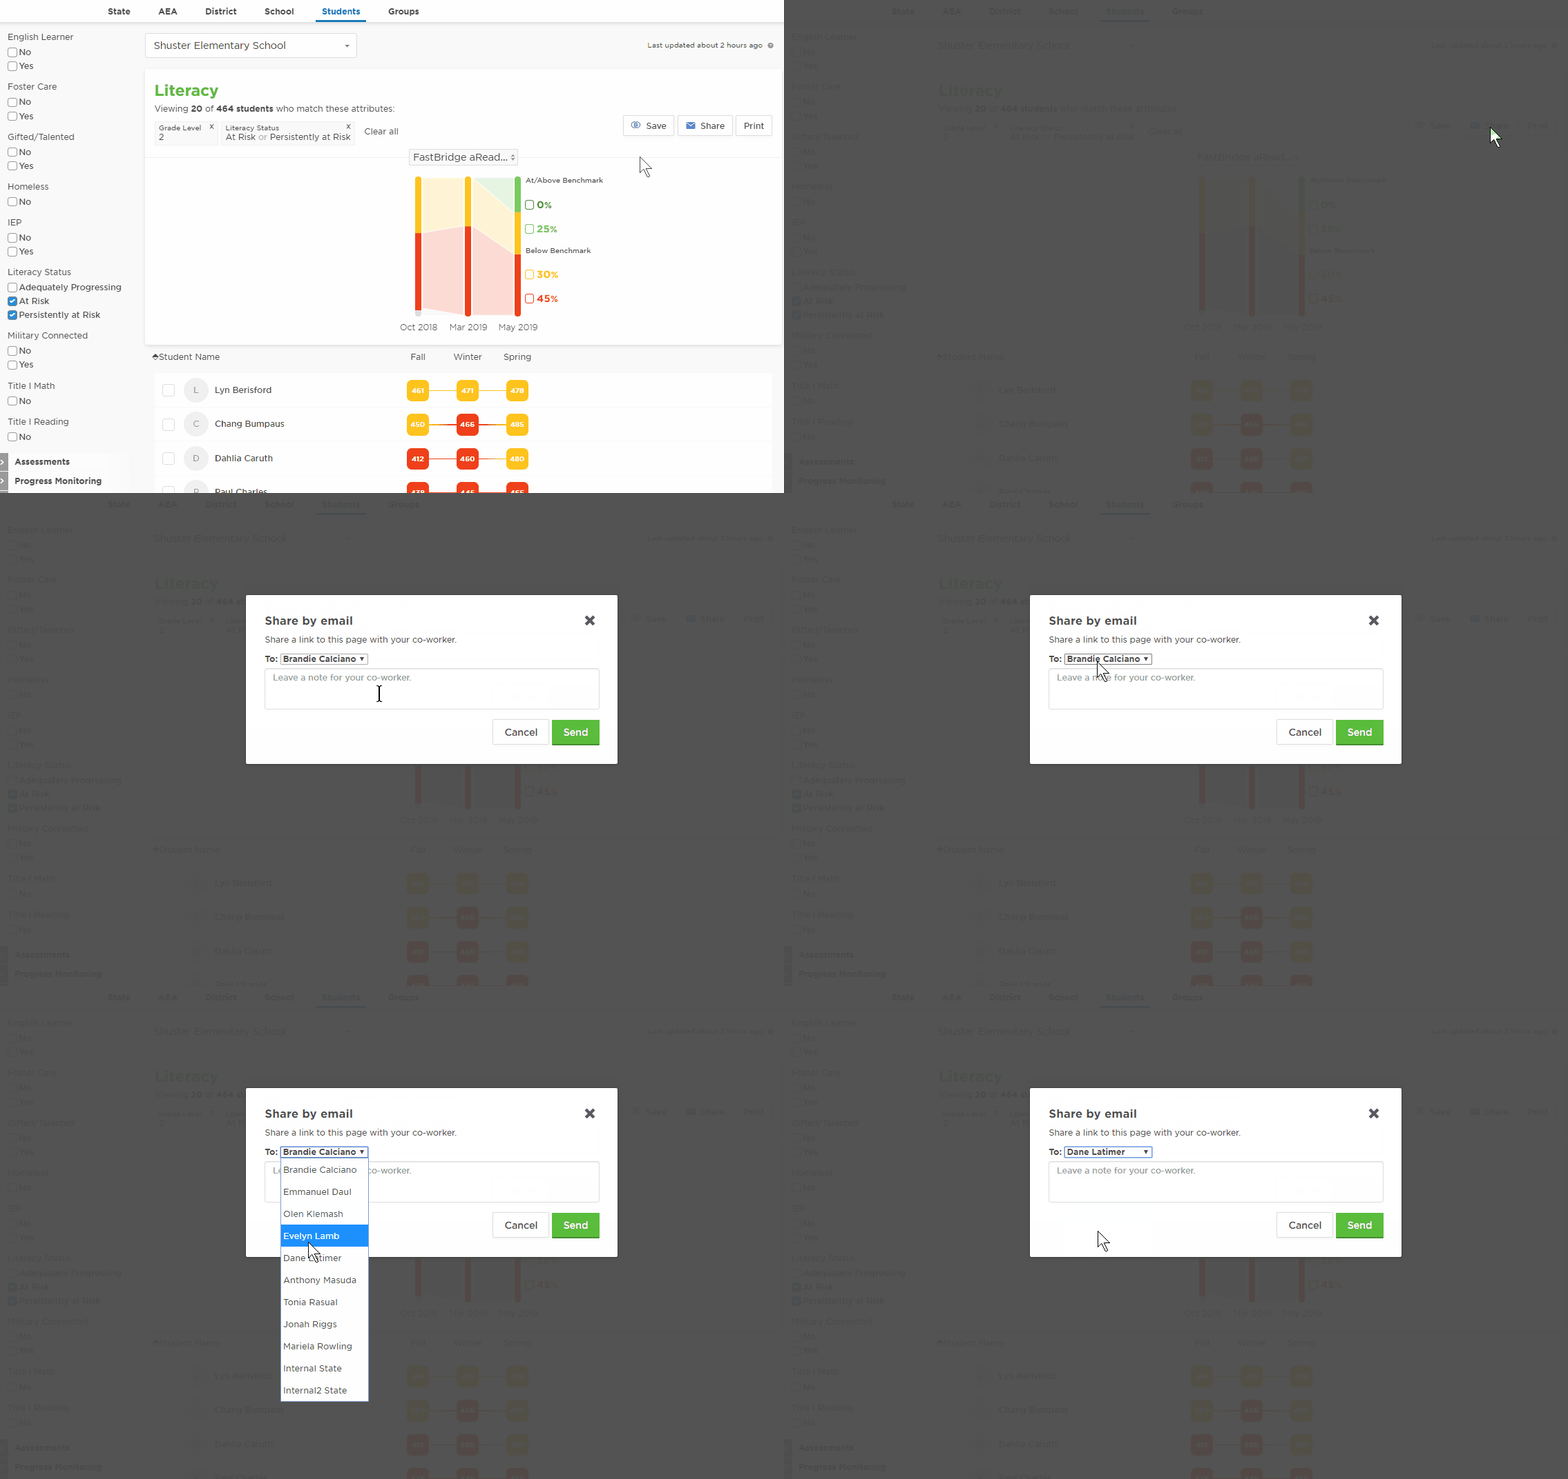
*visual above is a non-printable gif animation
Why isn’t a teacher listed on the ‘Share This Group’ page?
The person you want to share the group with must meet the following minimum requirements:
Must have access to at least one of the students in the group
Must have accessed Student Success via EdPortal at least once
Overnight refresh must run after teacher logged in
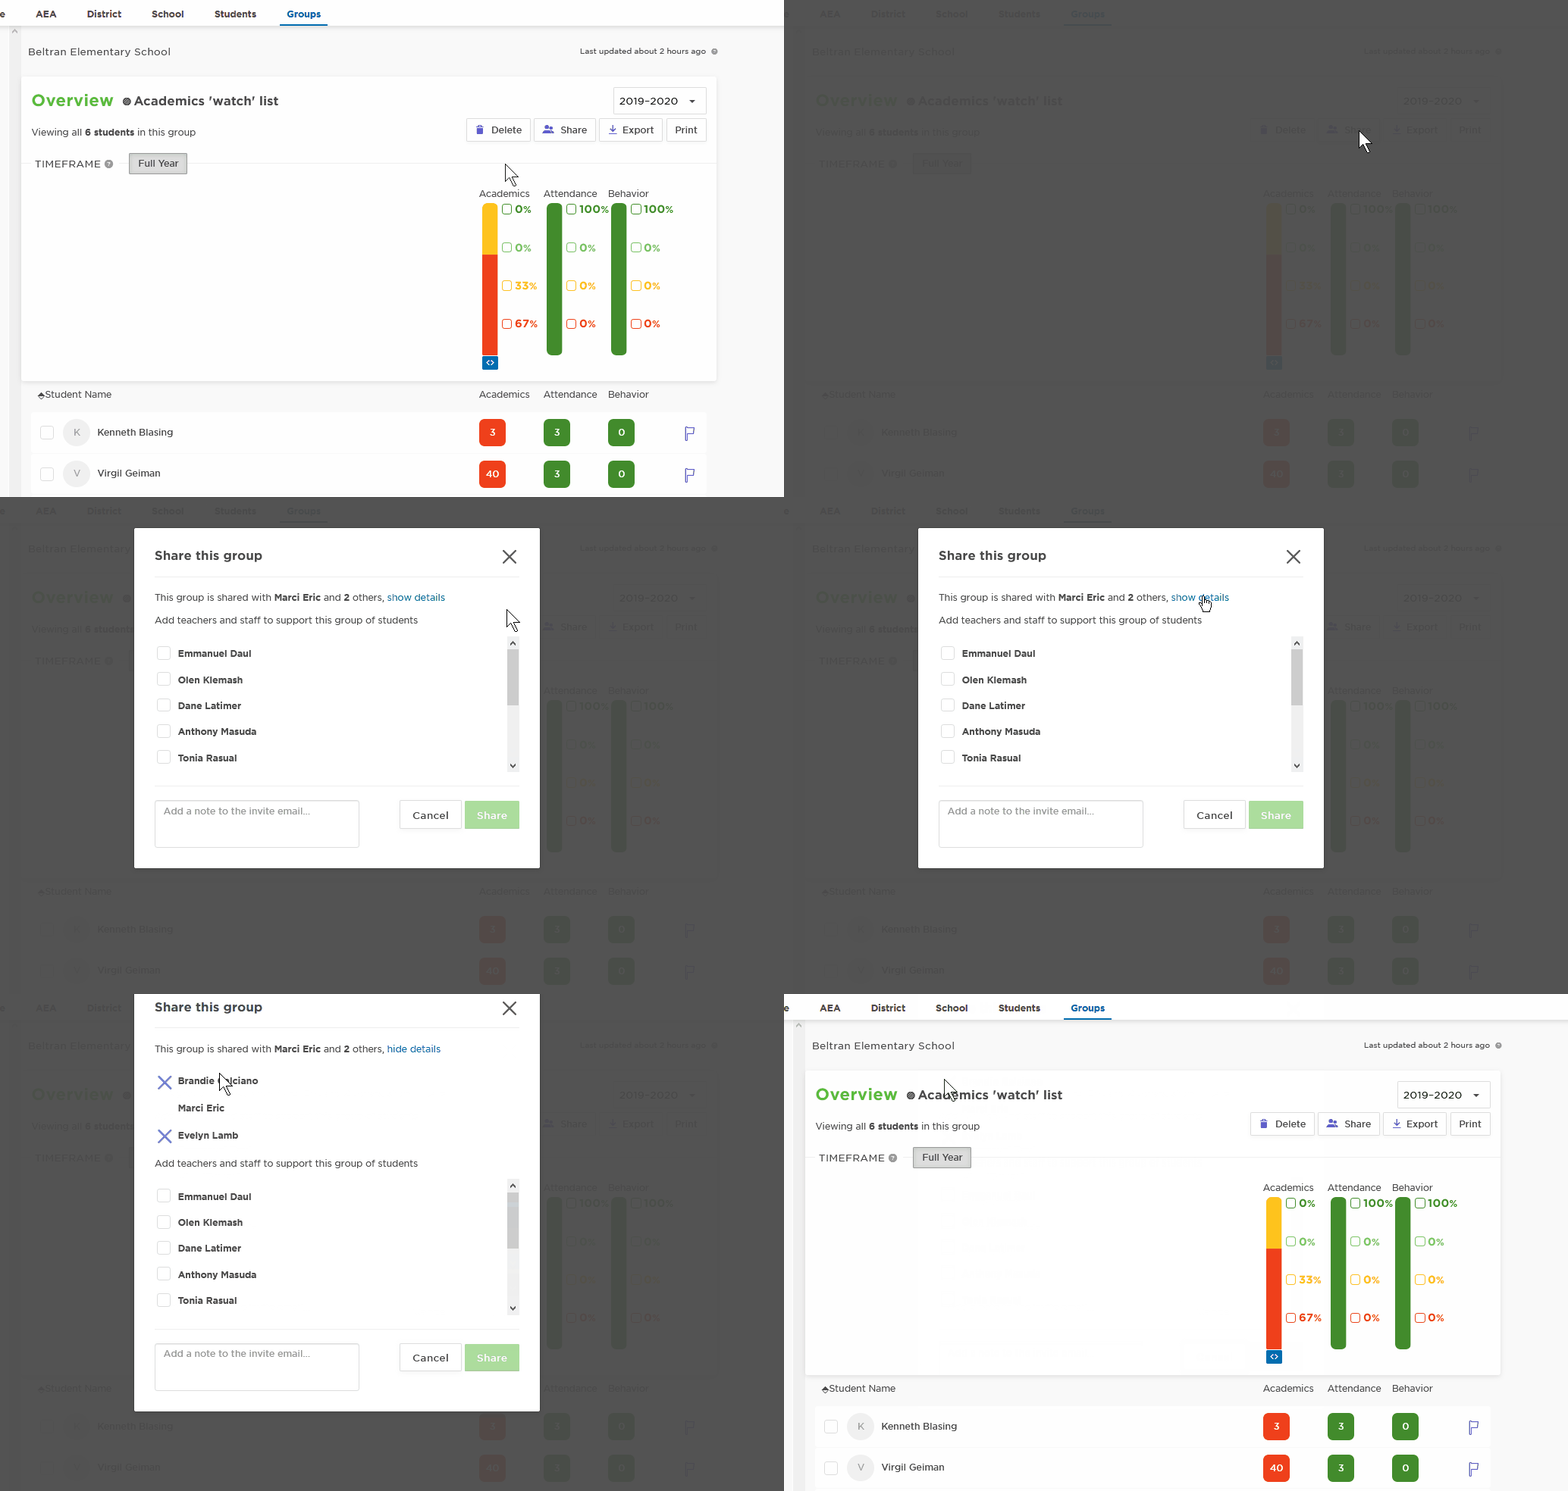
How do I unshare a group?
On the Groups tab, select the group
Click the Share button
At the top, it will say ‘This group is shared with…” click Show Details next to that sentence
Click the X next to the user to remove